 How to lay grass sod is pretty simple and easy to perform if you pay attention to a few key steps and tips. It is all about executing the process efficiently which will decrease time and quite possibly, save you from a small migraine. The type of grass you’ll want to use will come down to functionality, sunlight conditions, soil conditions and the type of look you desire. We’ll also discuss and how to determine a starting point for grass installation process.
Before we start any part of the grass installation process, we need to make sure a few things have been handled. One, make sure that any debris in the area is removed and the dirt properly graded. Second, run the irrigation system to check for leaky heads or any breaks that may be present. We do not want to do any repairs or regrading once the grass goes down. After the irrigation system is up and running, run the system for about 30 minutes during night to compact the soil.
Moreover, thirdly, we want to choose the type of grass that best fits your wants and needs. Knowing these two things will decide the type of grass we will be installing. Functionality, soil, sunlight and aesthetics will be determining factors in choosing the right fit as there are several different sod varieties to choose from. For a more in-depth view of each type of sod, visit our sod variety page(for those in zone 8 to 10).
Follow these step for how to lay grass sod the right way. Now that we’ve prepped the areas properly, the irrigation system is up and running, and you’ve decided the grass variety that best fits your needs we are ready for the grass installation process.
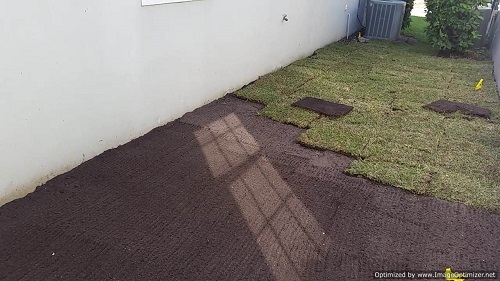
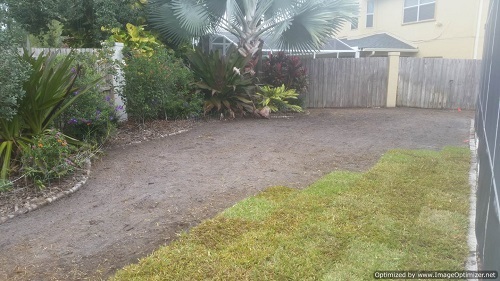
The starting point does not matter, but for those wanting to maximize efficiency and minimize cut-ins and cut-outs, it is best to start from the edge of the grass and flower beds working your way towards the concrete. For example, you are replacing your easement which extends into the neighbor’s yard, which you are only replacing your section, start from the grass line(the edge of your neighbors lawn) and work towards the concrete. For a step by step instructional video that shows you how to check this page out.
Doing this will eliminate cut-ins that would otherwise be necessary if you were to work from the concrete towards the grass. No matter which staring point you choose, you’ll still have to cut pieces to fit and cut out grass extending over the concrete.
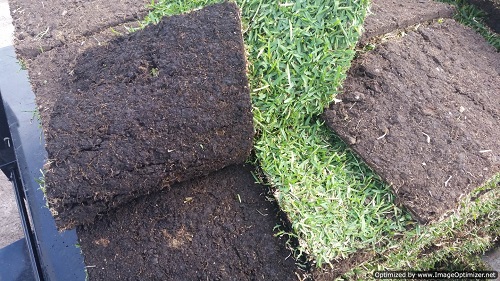
When installing sod pieces (usually 16”x24” each), you can work them horizontally or vertically. Whichever direction you choose, be sure to continue that way the entire length, if not you could potentially leave small gaps and spacing that will need to be plugged up with cut-ins (time-consuming).
While installing the sod, be sure that each piece of grass is snugly connected to all pieces near it, this will eliminate spacing. Too much spacing or big gaps could lead to a potential weed uprising or allow seeds germinate. If this happens you are either facing three options. One, spend money on chemicals to try and combat the weeds. Two, re-sod the areas, this will cost more money. Three, do nothing and let the weeds take over. It’s best to avoid any of these options and install the grass snugly.
After you’ve learned how to lay grass sod and have completed your grass installation project, it’s time to learn how to care for your new sod. Fertilization, mowing and proper watering are crucial steps in maintain a healthy lawn.
When all the grass installation is finished, you are left with cut-ins and cut-outs. There are many tools and techniques you can use to cut the grass just the way you need it. Some people use knives or machetes; we like to use a stick edger. Using a stick edger not only leaves a cleaner cut but speeds up the process tremendously, especially on larger projects.
Once everything is finished, it is time to adjust the sprinkler heads for coverage and schedule the timer accordingly. Following these steps and tips will speed up the process and give you direction if you were unsure of where to begin. We are always a phone call away if you need a professional sod service to help with any of your grass installation project needs.

You guys did such a great job! We we so impressed, when we returned home,!
9 years ago
